Firing procedureCurrent releaseVerified through Patch #6

First Firing & Large-Miss Checks

Build the solution from the correct origins, carry it through the in-game calculator, and make the physical gun match before you fire. If the miss is large, check the information chain before chasing fine correction.

FIELD PROCEDURE / 01

The firing chain, in one pass

  1. Read the order. Identify the stated observation or reference origin and the information attached to it.
  2. Plot the target. Put each bearing or distance on the Tactical Map from its own origin.
  3. Build the final line. Read range and bearing from the current Nest firing origin to the plotted target—not from the spotter.
  4. Use the in-game calculator. Enter the firing data and copy its required gun settings carefully.
  5. Match the physical gun. Set charge, elevation and turret bearing; complete loading, then fire.
  6. Observe before changing inputs. For a large miss, recheck origin, range, copied output and physical settings in that order.

This is a safe input-check order, not a universal ballistic formula or an exhaustive precision guide.

Firing handoffSite explanation · not an in-game screen
  1. 01READHigh Command order
  2. 02PLOTRecon constraints
  3. 03FIXTarget position
  4. 04DRAWFinal firing line
  5. 05CALCULATEGun settings
  6. 06MATCHCharge · elevation · bearing
  7. 07FIRELoaded gun
  8. 08OBSERVEImpact and result

RECEIVE / PLOT

Keep every measurement attached to its origin

High Command gives you information to plot, not a finished turret setting. Read the named Nest, spotter or reference location first; then construct each measurement from that location on the map.

Observation bearingstarts at the reported observerFiring bearingstarts at the current Nest

Once the target is fixed, the final line from the Nest to that target supplies the relationship the gun needs. If the geometry itself is uncertain, resolve it in the positioning guide before calculating.
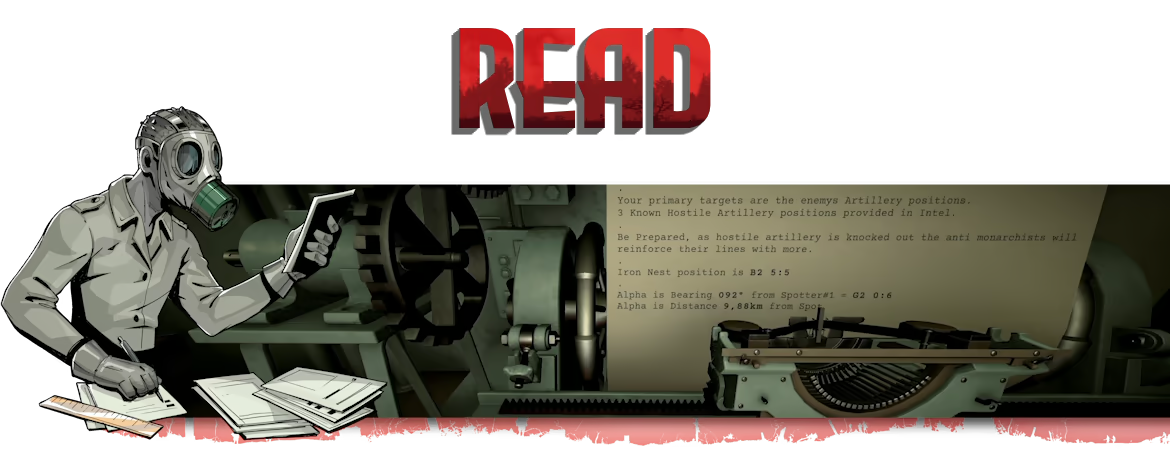
Official IRON NEST store composite showing an operator reading a High Command sheet at a typewriter
What this shows: a High Command sheet carrying Nest, spotter, bearing and distance information. Official Steam Store media; the displayed values are an example, not universal inputs. Exact build is not visible.

CALCULATE / TRANSFER

The calculator is a station in the chain—not the end of it

Enter the final firing information you read from the map. Then copy the required outputs to the gun. The site does not reproduce the calculator's internal mathematics, and the numbers visible below only belong to this captured example.
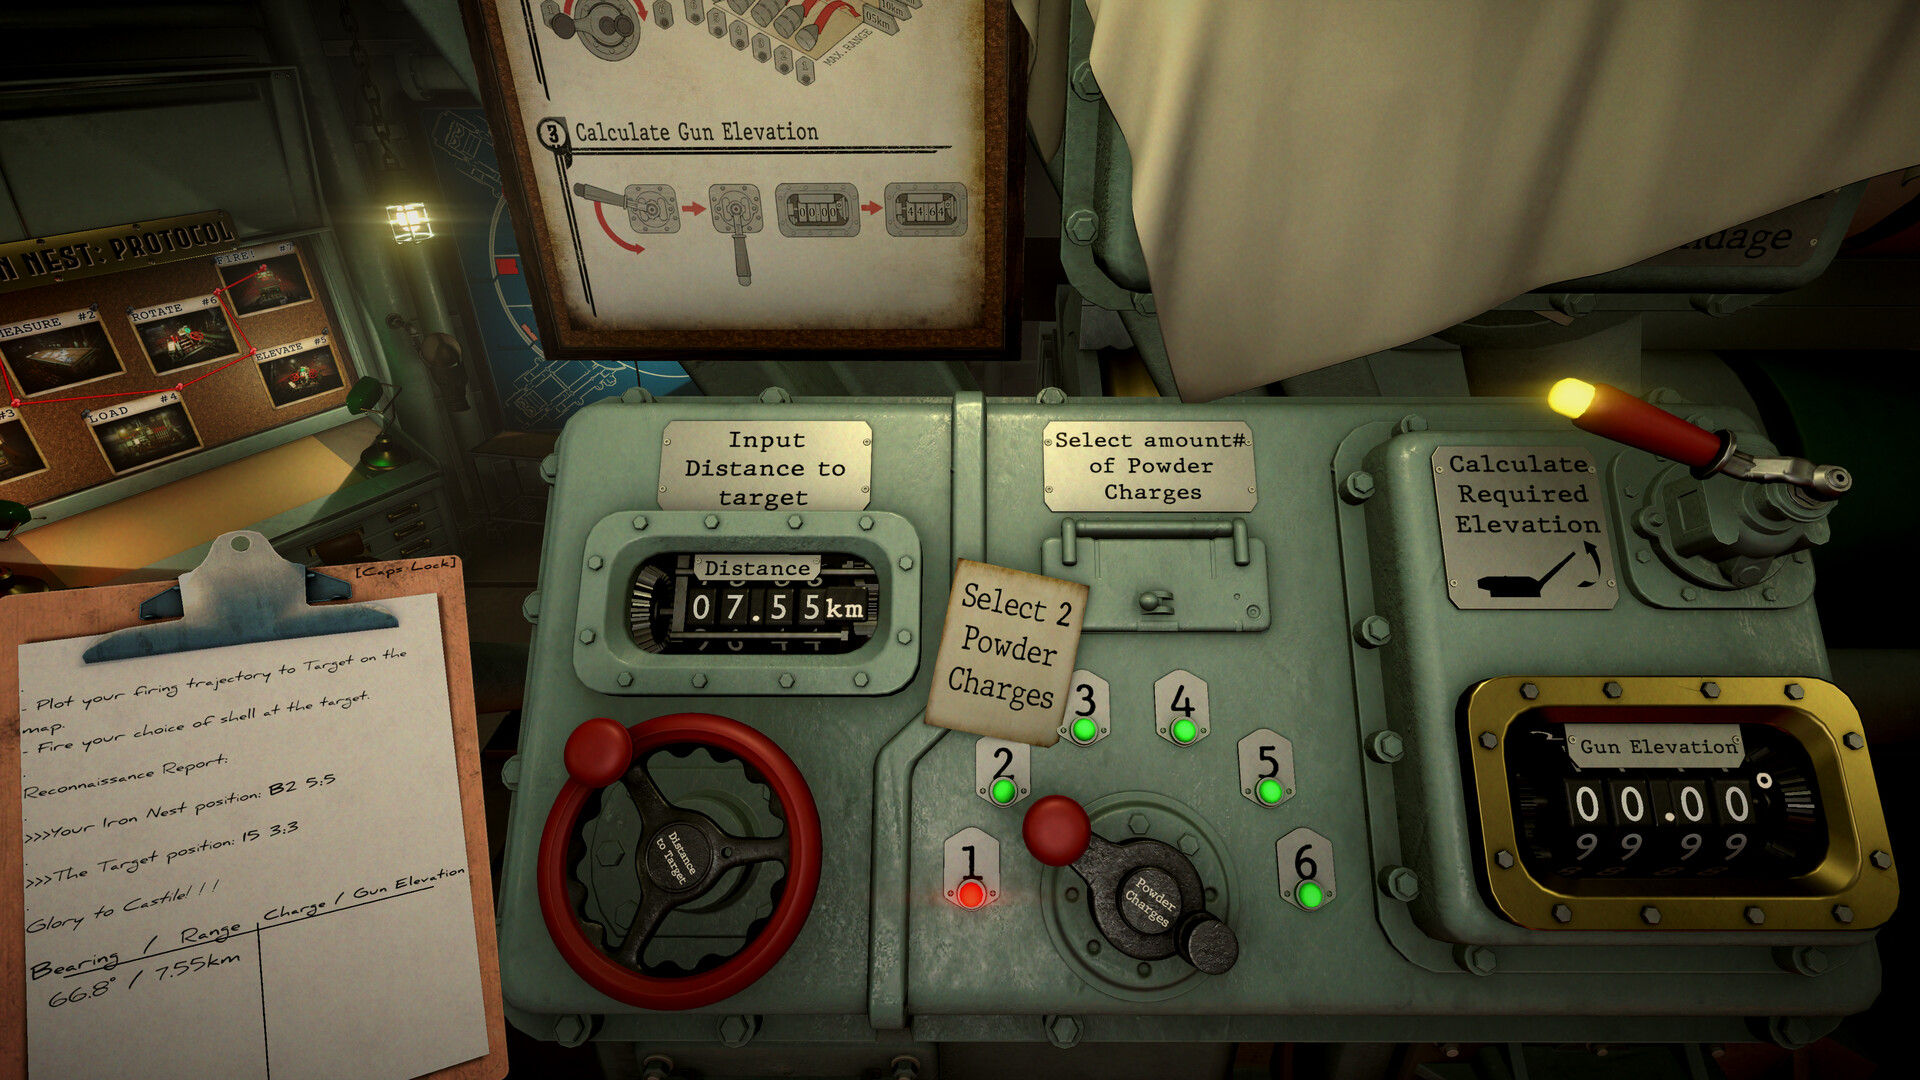
IRON NEST ballistic calculator station with a completed example firing solution
What this shows: the in-game calculator displaying bearing, range, powder-charge and elevation information for one firing example. Official Steam Store image; build not visible.

MATCH / VERIFY

Read the solution back against the physical gun

A copied result becomes useful only when the loaded and set values agree with it. Check each input family once, without silently substituting the observation line for the firing line.
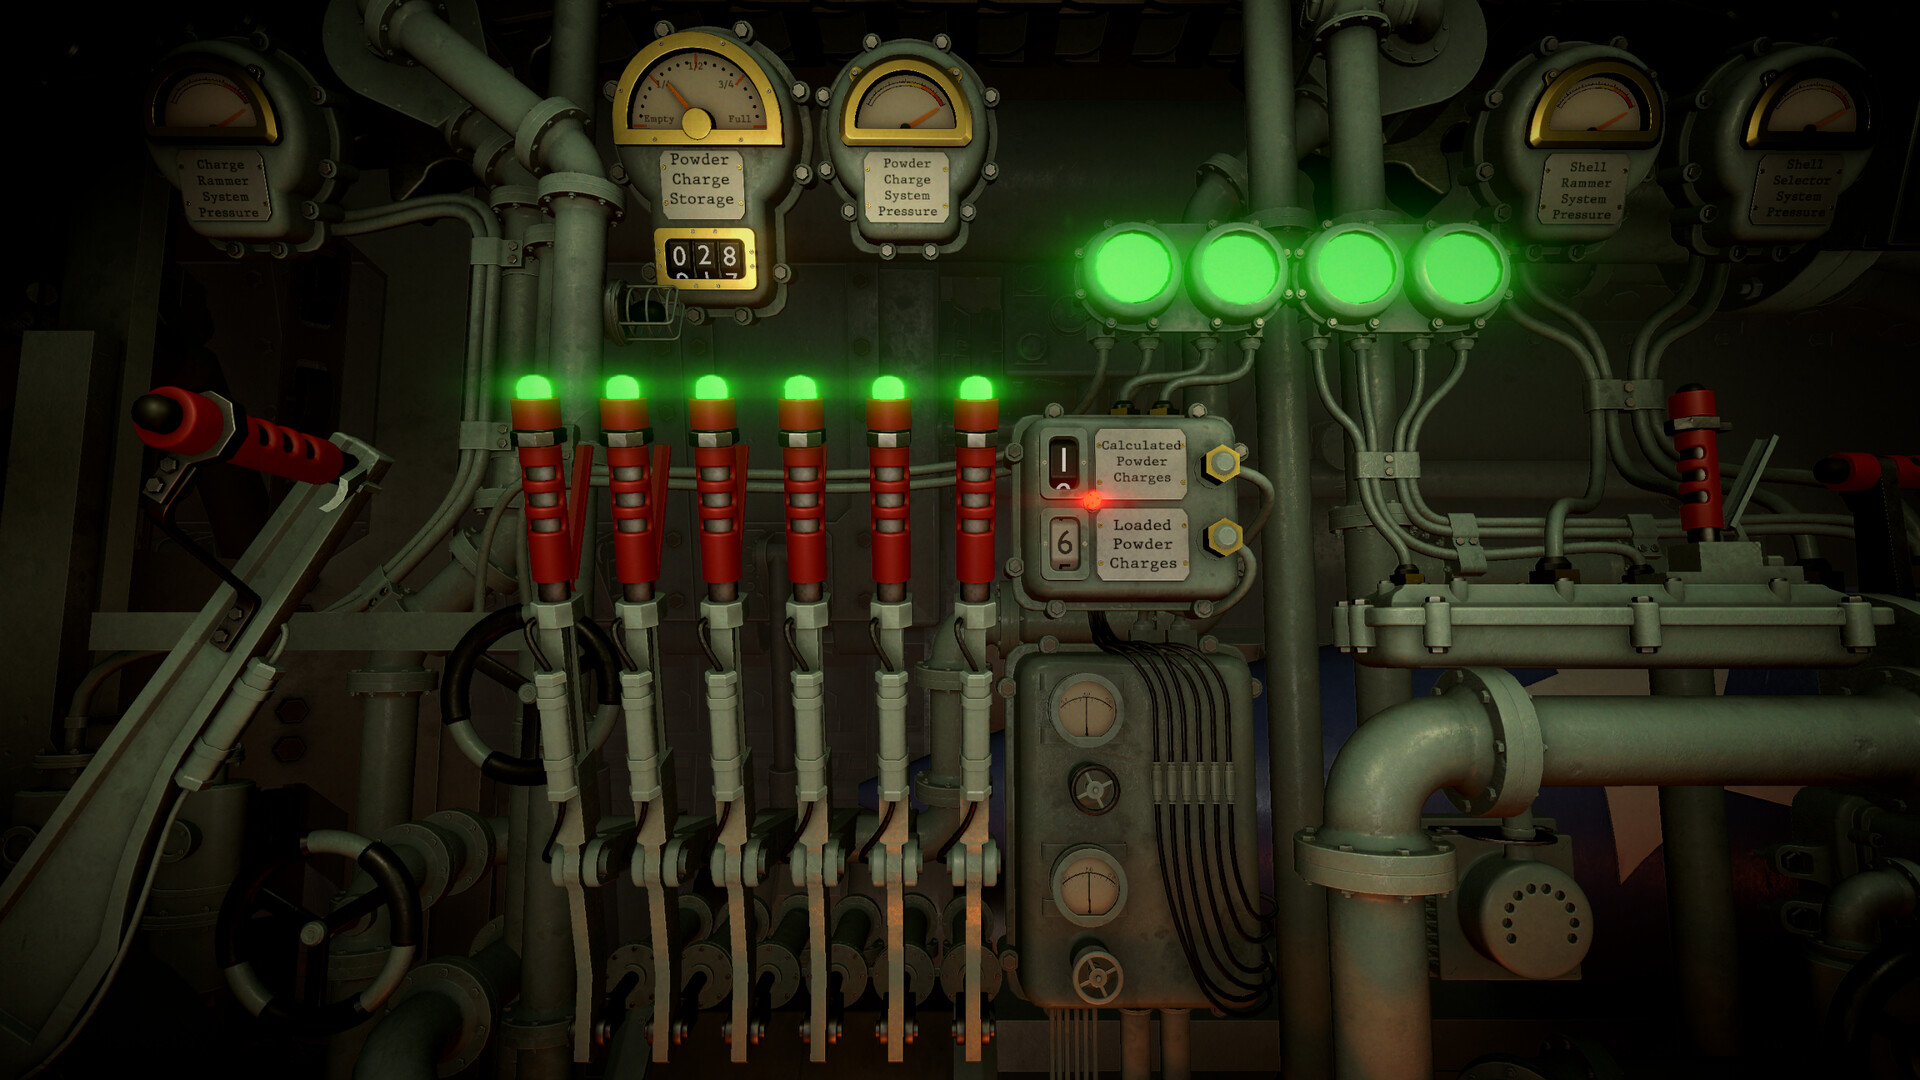
IRON NEST powder-charge station showing calculated charges 2 and loaded charges 6
Narrow diagnosis evidence: the visible interface shows calculated charges 2 while loaded charges read 6. This proves that this mismatch can be visible—not that it explains every long or short miss.
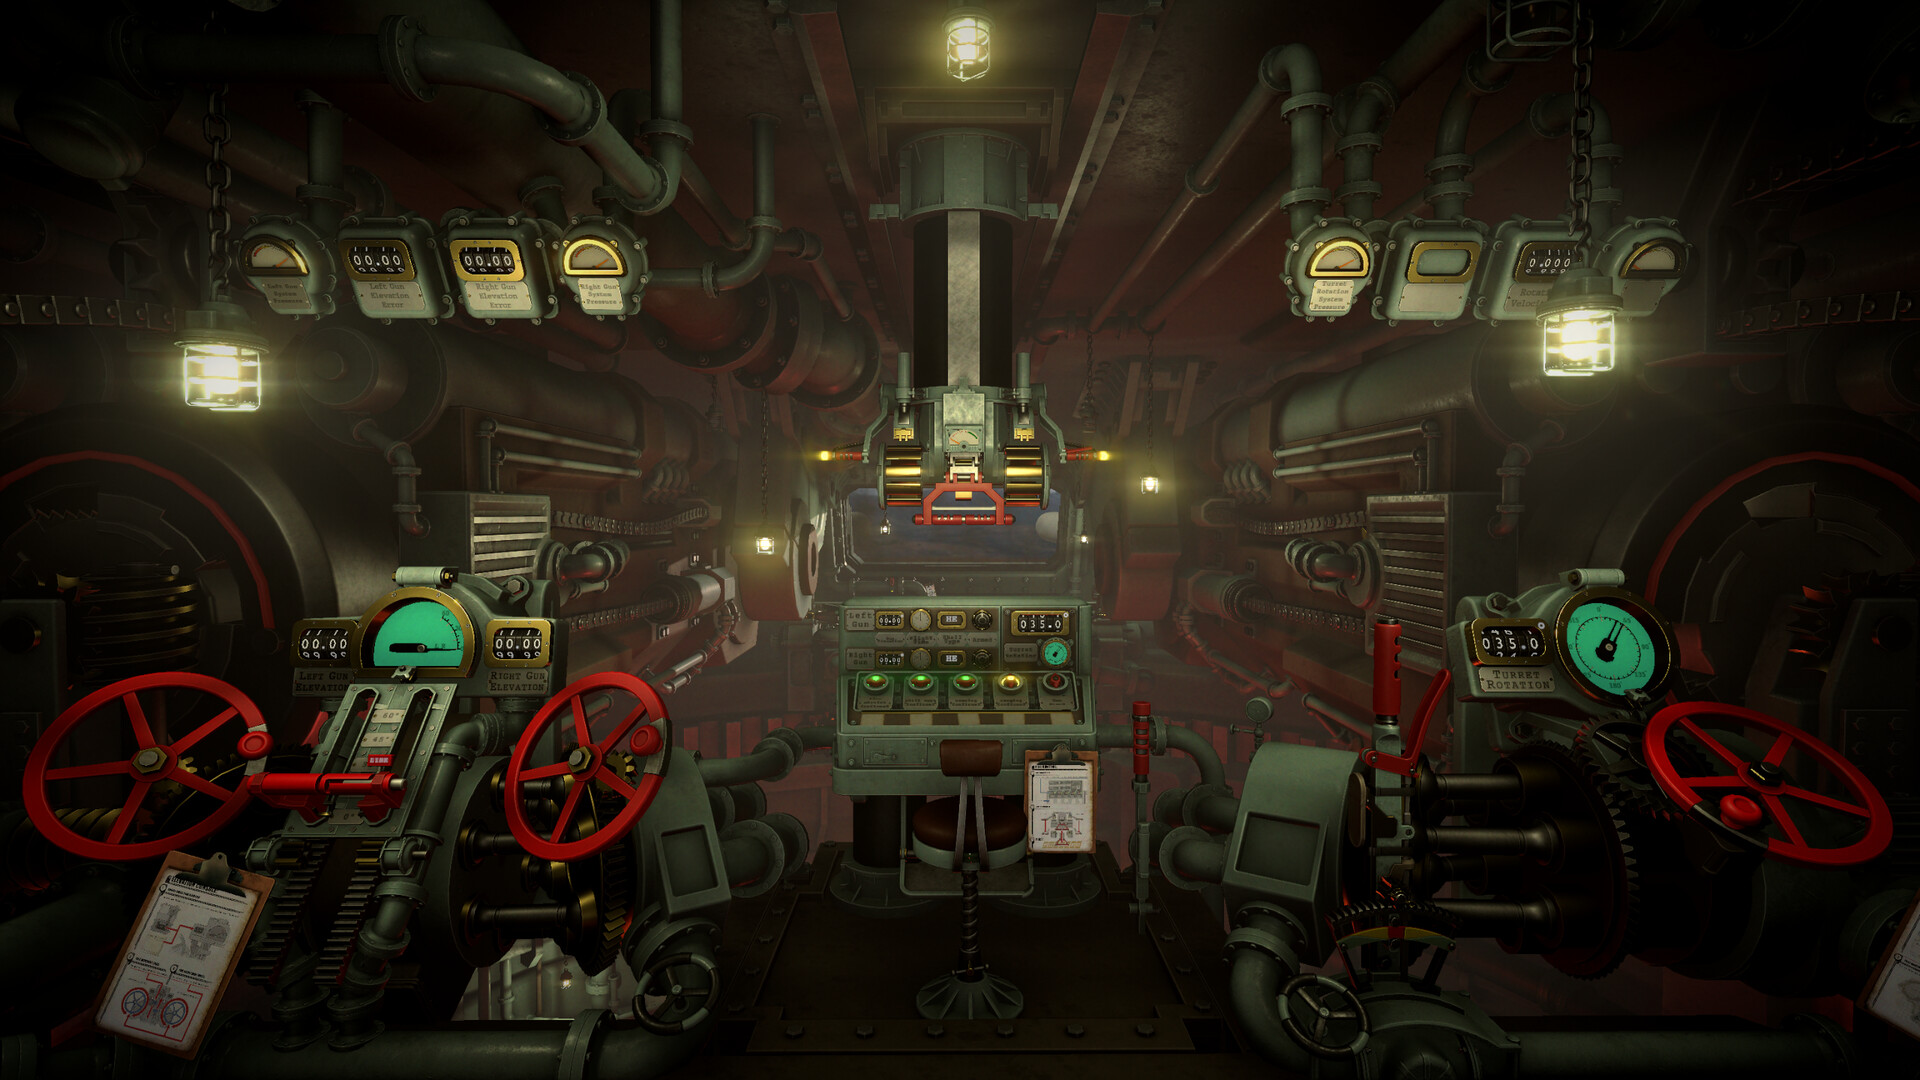
IRON NEST interior showing separate gun elevation and turret rotation control stations
Station recognition: elevation and turret rotation are distinct physical settings. Official Steam Store image; exact controls and build are not established by this frame.

DIAGNOSE / RETEST

If the miss is large, check the source before the correction

Use the symptom to choose the first input family to recheck. Change one diagnosed family, fire again and observe. No fixed angle, distance tolerance or universal correction value is claimed here.

01
SYMPTOMThe shot is far off to one side
FIRST CHECKRecheck the origin and the final firing bearing.

The observation bearing belongs to its reported origin. The turret needs the bearing from the current Nest position to the plotted target.

02
SYMPTOMThe line looks plausible, but the shot is very long or short
FIRST CHECKCompare copied range, calculator input and the physical gun state.

Read back the calculated charge against the charge actually loaded, then recheck elevation. Do not change every setting at once.

03
SYMPTOMThe calculator looks right, but the gun does not
FIRST CHECKTreat output and loaded state as separate checkpoints.

A correct calculator result is not the final state. Charge, elevation and turret bearing still have to be transferred to their stations.

04
SYMPTOMThe expected firing or result state never appears
FIRST CHECKRecheck the station handoff and loading state.

Confirm the physical sequence before assuming the miss is a hidden ballistic problem.

CONTINUOUS DEMONSTRATION

Watch the stations hand off in sequence

The written procedure carries the answer. Load this creator video when seeing the continuous movement between stations would help.

Current-release creator demonstration. Reviewed sequence: High Command 00:37, map 01:10, calculator 01:51, loading 02:44, rotation 04:22, elevation 05:12 and firing 06:39. No game build is visible; this supports the station handoff, not hidden ballistics.